This text is the fourth of five on electronic navigation applications. It covers the use of the Savvy Navvy application to perform the eight essential navigation tasks:
- obtaining electronic charts
- read chart symbols;
- measure distances and angles;
- learn about currents and tides;
- evaluate speed and course over ground;
- plan and execute routes;
- exchange planned routes;
- record the actual route taken.
The other texts cover the Navionics (Boating), C-MAP, OpenCPN and SEAiq applications respectively. This text assumes that the application is installed on a device independent of the sailboat’s instruments, such as a tablet or GPS-enabled cell phone. In this respect, the Introduction to electronic navigation applications text, as well as the Introduction to electronic charts text, are good prior reading. They cover elements common to all navigation applications installed on such devices.
Savvy Navvy
Savvy Navvy is an application for displaying electronic charts. It is available on both Android and Apple devices.
It is an app that was recommended to me by other Nova Scotia sailing instructors. Two features of the app caught my attention. Firstly, in the presence of currents, it is capable of recommending a course to steer to keep a course over the ground. Secondly, it accepts manual methods for taking fixes. An application that helps students digest these concepts on the water is an invaluable teaching tool. However, as we’ll see below, the application neglects some important fundamentals, so it’s difficult (in my opinion) to see it as an all-purpose application.
Getting charts
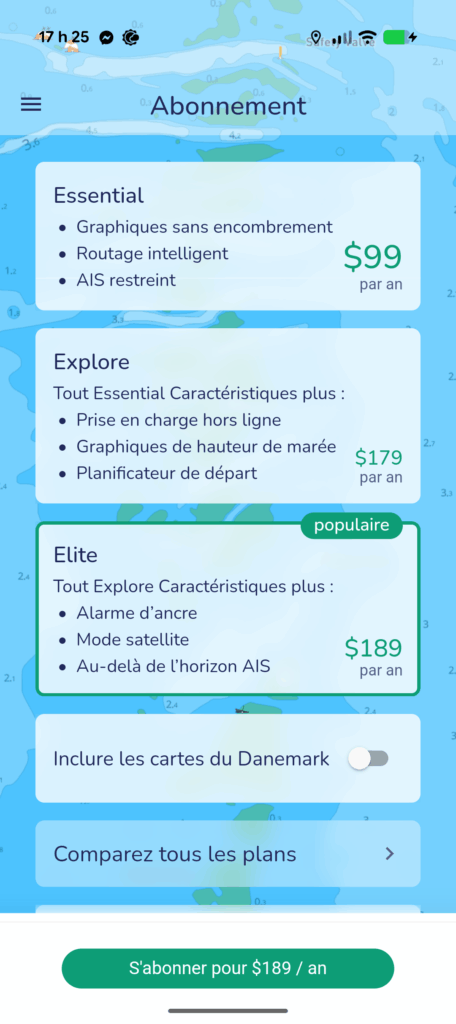
Savvy Navvy offers the use of charts through annual subscription plans. Pricing for these plans increases with the features offered. In 2025, the basic subscription costs $99, while the “Elite” subscription costs $189. For evaluation purposes, I took the basic subscription.
There are three important features of the basic subscription. First, it is not possible to access offline maps, meaning you are confined to navigable waters close to a cellular network, or to ships with an Internet connection. Sailing without a network? Impossible without paying more… or using another less expensive application.
Secondly, the basic subscription offers no tide information, meaning you have to rely on another data source to calculate tide windows.
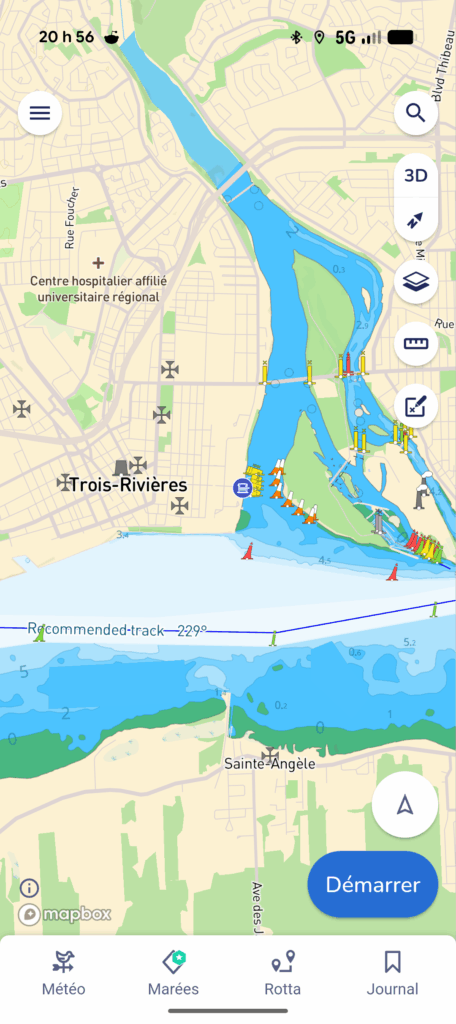
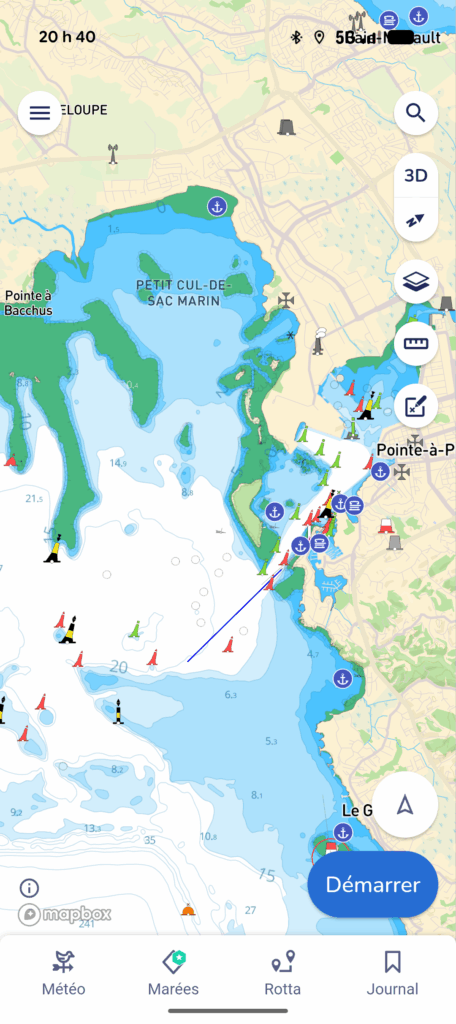
Finally, on a positive note, the subscription offers access to a multitude of international charts. Subscribing gives you access to charts for Canada, the Caribbean and Europe. Above, I’m showing maps for Trois-Rivières (Quebec, Canada) and Pointe-à-Pitre (Guadeloupe), but I could have chosen ay of the regions covered in blue below. This is a major plus for an international traveler.

To gain access to the map-saving features and tide tables, you need to pay an intermediate subscription. The application therefore takes a different approach to its competitors, offering charts almost everywhere in the world, but without tidal currents and without the possibility of internet-free navigation.
Read symbols on the chart
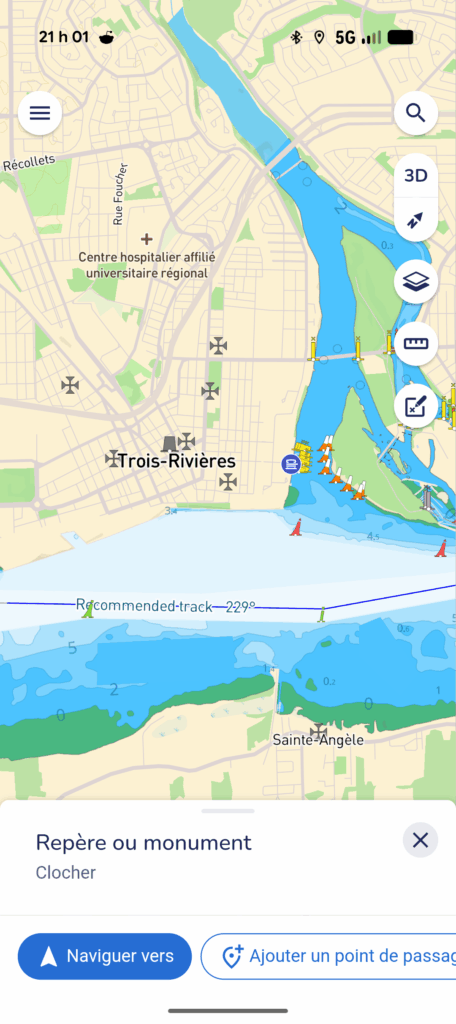
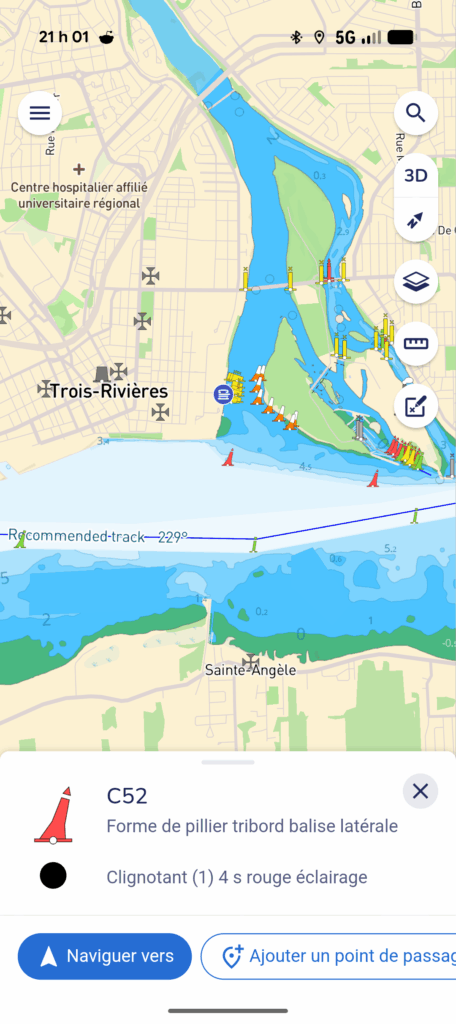
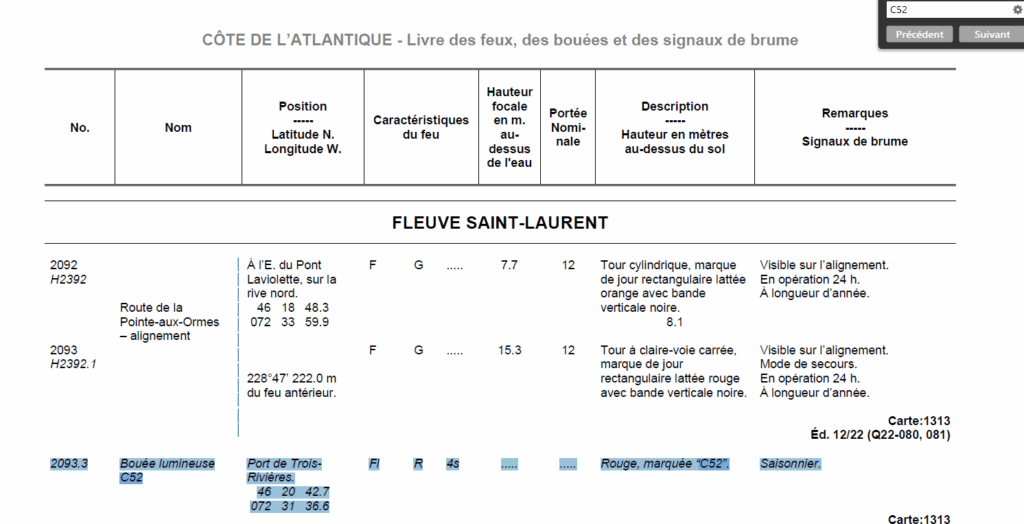
To read a symbol on the chart, simply click on it and a pop-up window appears, displaying the associated information. Above, I show, on the left, the pop-up window for a steeple visible from the St. Lawrence River. On the right, the pop-up window displays details of buoy C52. In particular, we can see its lighting characteristics and its shape. Like all other navigation applications, the information provided on buoys is not as complete as the Book of Lights, Buoys and Fog Signals.
When it comes to symbol reading, two major limitations emerge from the application. On one hand, the contextual menu does not allow you to identify the landmark you have clicked on. When the map is dense with bitterns, this can lead to confusion. Which bittern does the information displayed belong to? For example, the image on the left, shown above, does not identify which bell tower is being referred to. If you tap on an object by mistake, you can easily draw the wrong conclusions!
On the other hand, it is not possible to obtain information on symbols designating natural navigational objects. You have to resort to chart #1… and hope that the application’s symbols correspond to local or international conventions.


Measuring distances and angles
To measure angles and distances, use the 5th button in the top right-hand corner of the image, the one that looks like a ruler.
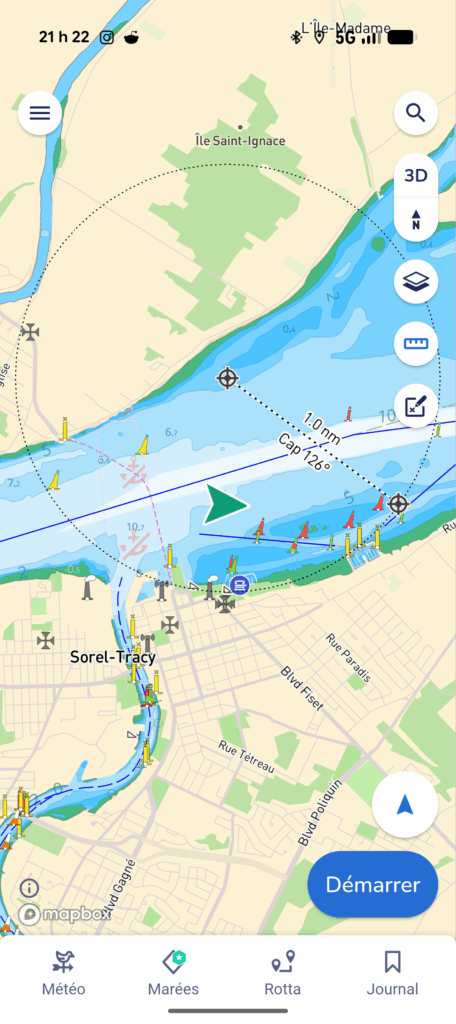
Tapping on it brings up a distance circle where the center of the circle and a point on the circle are marked by targets (Figure left). The distance and heading between the two points is then displayed on the dotted radius connecting the two targets. The convention is that the displayed heading is in true degrees, and emanates from the center of the circle.
In the image on the left, we see the example of a distance of 1.0 nautical mile (nm) at 126°, meaning that starting from the center of the circle, it takes one nautical mile to reach the starboard (red) side buoy SN22.
By moving the targets with your fingers, you can measure virtually any distance.
Information on currents and tides
Savvy Navvy’s basic subscription does not provide access to currents or tides. This is a significant limitation, requiring reliance on other sources of information, such as the Federal Tidal Application, or the St. Lawrence Global Observatory.
Evaluating speed and course over the ground
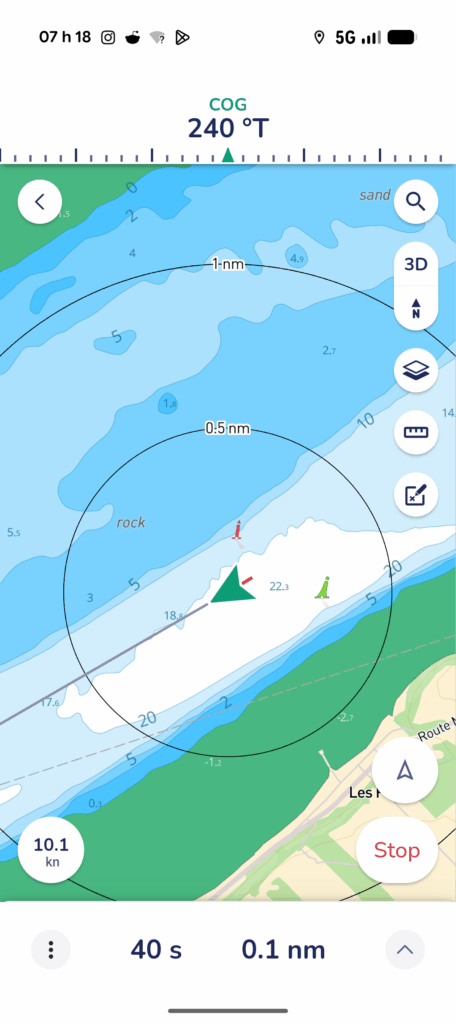
Speed and course over ground (SOG, COG) are displayed when starting real-time navigation. To start navigation, simply press the “start” button in the bottom right-hand corner. Speed over ground is then displayed at the bottom left of the screen. The route over the background is displayed at the top of the screen, in the form of a pseudo-compass. In the image above, the course over ground is 240° true and the speed over ground is 10.1 knots.
It’s also worth pointing out the obvious: the green arrow in the center of the screen corresponds to the boat’s position. Other real-time navigation information is discussed in the section “Recording the actual route taken”.
Planning and executing routes
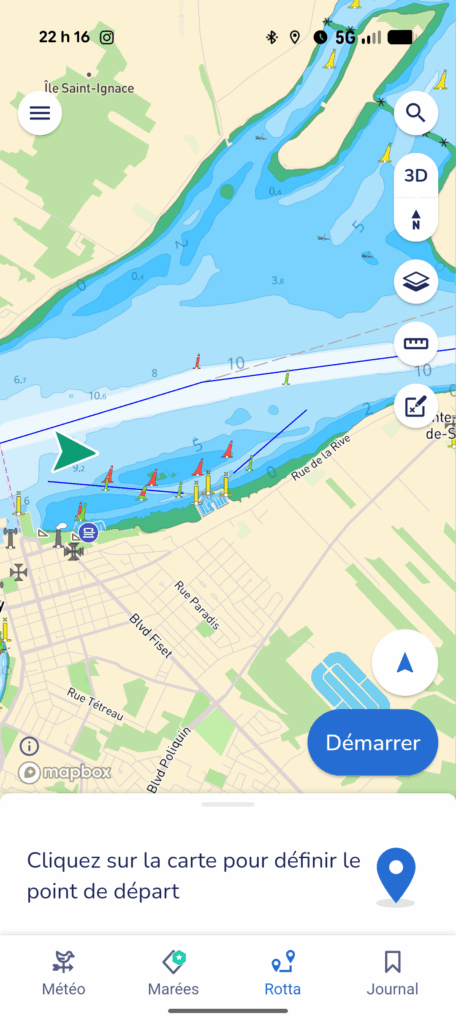
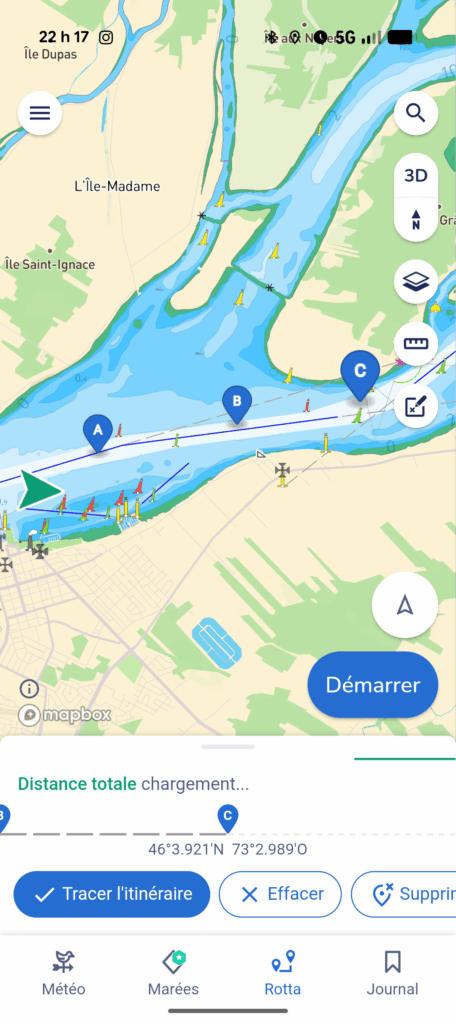
To create a route, use the Rotta menu (!). By clicking on the menu, a route creation interface appears (left image above). Then simply tap at the point on the map corresponding to the firstwaypoint, then the second, and so on, until a route has been completed. In the center image (above), a route with three waypoints is shown. Savvy Navvy automatically labels these waypoints in alphabetical order.
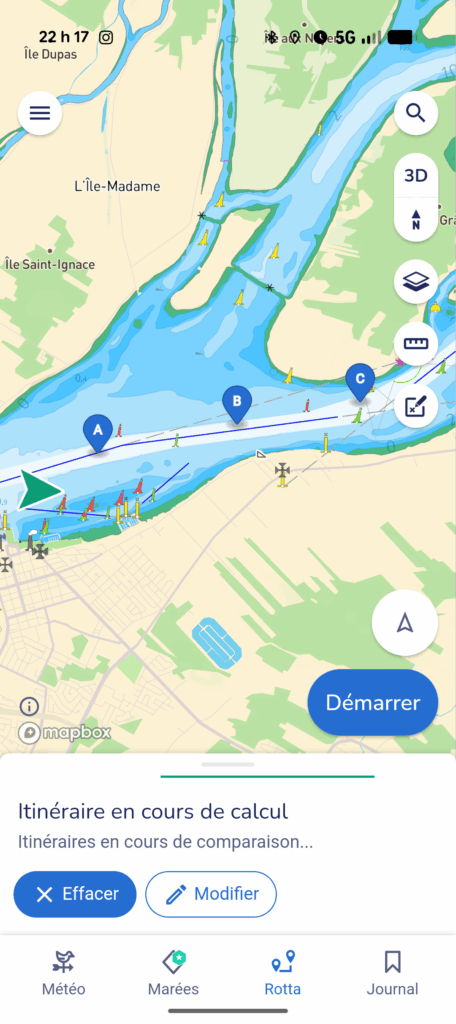
From this point on, things get complicated: as soon as you hit the “plot route” button, Savvy Navvy seems to engage an algorithm that tries to determine the shortest path route through these waypoints… and doesn’t seem to be able to get out of it! I don’t know if it’s because it doesn’t know the St. Lawrence River or if it’s a bug in the application, but it’s unable to display the simplest route, which consists of straight lines between the points. This is an important flaw.
You can, however, save the route before it is “calculated” (image below), but it will still not be possible to activate it without the application attempting to calculate it.
Exchanging previously planned routes
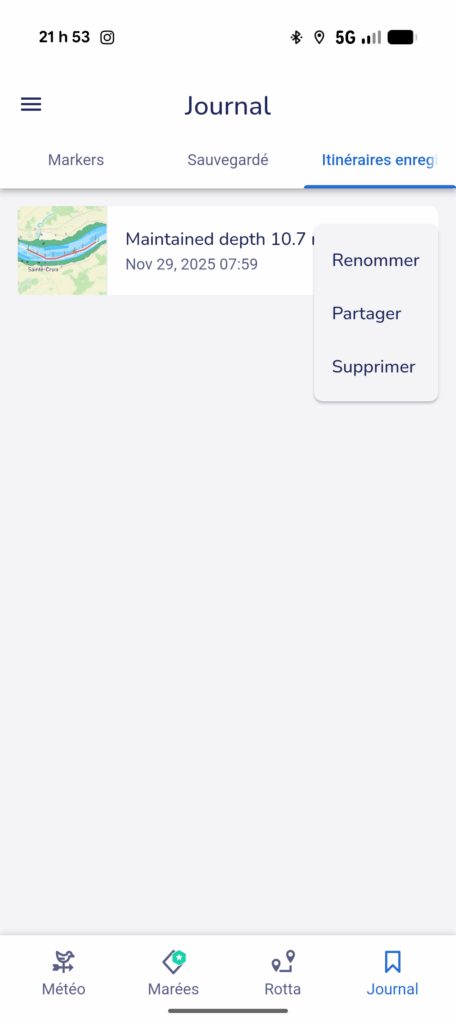

To exchange planned routes, go to the log menu (bottom right). Once a route has been saved, it can be shared by clicking on the associated contextual menu (pictured above left). Simply click on the “share” button to access a sharing link.
The link requires that the other person receiving the route has the Savvy Navvy application installed to be able to view it. Unlike other apps it is not possible to exchange routes between different navigation applications. This sharing tactic is a technique for selling subscriptions.
Recording the track
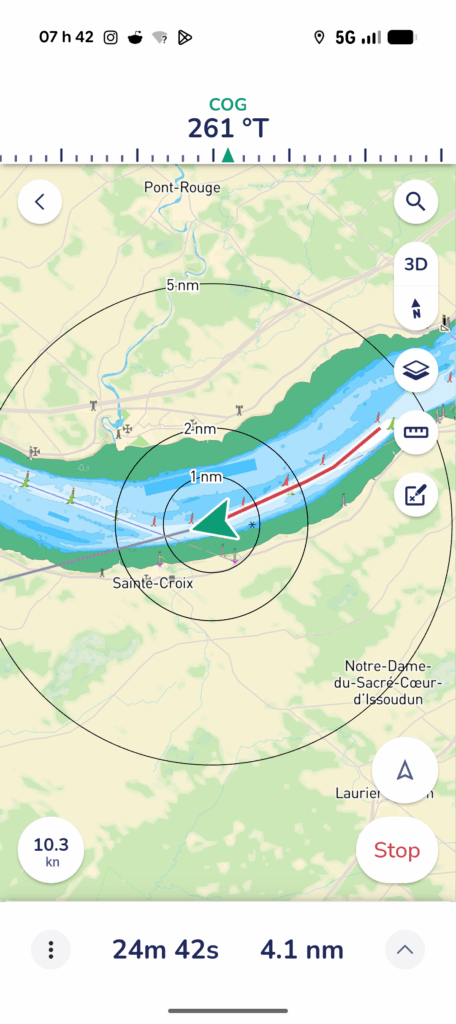
To record a route, simply press the start button in the bottom right-hand corner of the screen. The application automatically displays distance circles around the boat’s position, course over ground, speed over ground, the track, the cumulative distance and the trip duration (image left).
The figure on the left shows a bottom speed of 10.3 knots (kn: knots) and a bottom track at 261° true.
The duration and total distance of the trip is displayed at the bottom center of the screen. In the image on the left, we see a distance of 4.1 nautical miles and a duration of 24 minutes 32 seconds.
Finally, the track is shown in red on the map. This corresponds to the route taken by the boat during the recorded trip.
Once the route has been completed, it can be saved and shared.
Conclusion
An optimist might argue that Savvy Navvy is perhaps complete with a premium subscription. Otherwise, with the basic subscription, it is objectively overshadowed by other applications. This text highlights three major shortcomings.
Firstly, it is impossible to ask the application about the meaning of certain navigation symbols. Anything to do with natural hazards to navigation remains just a symbol on the display. This is an omission, which makes it necessary to keep an eye on chart #1.
Secondly, I’ve never been able to run a navigation route. Perhaps it’s the specific combination of my device and the app, the specifics of the St. Lawrence River, or my difficulties in understanding the app, but its smart routing algorithm seems caught in an infinite loop. At every attempt, the application refused to display a route created under the pretext that it had to calculate the associated itinerary. For planning purposes, this is a flaw.
Thirdly, it’s impossible to share routes without using the application’s proprietary format. Unlike other applications such as OpenCPN, Navionics, C-MAP or SEAiq which can export in .gpx format, the route exchange format forces recipients to use Savvy Navvy.
These shortcomings add up to a picture of an application that fails to meet basic navigation needs. Perhaps they are covered with a pricier subscription.
Did you like this text? You can read more in the Learning section.

6 Responses
[…] other texts cover the Navionics (Boating), Savvy Navvy, C-MAP and SEAIQ applications respectively. Before reading this text, it’s a good idea to […]
[…] site includes five introductions to different applications: Navionics (Boating), OpenCPN, C-MAP, Savvy Navvy and SEAiq. Below, I detail the elements common to navigation applications generally found on small […]
[…] applications. It focuses on the C-MAP application. The other texts cover the use of OpenCPN, Savy Navy, Navionics and SEAIQ. It focuses mainly on installations on tablets or cellular devices that are […]
[…] first text covers the Navionics (Boating) application. The other texts cover OpenCPN, Savyy Navy, C-MAP and SEAIQ respectively. Prior to reading this text, it is a good idea to reat the […]
[…] describing the use of the electronic navigation applications: Navionics (Boating), C-MAP, OpenCPN, Savvy Navvy and SeaIQ. Each text examines hot to perform eight essential navigation […]
[…] other texts in this series cover the use of the Navionics (Boating), OpenCPN, Savvy Navvy and C-MAP applications. As prior reading, the texts Introduction to Electronic Charts and […]