You arrive in the Caribbean and finally reach the marina where you’ve hired a yacht. Once the administrative formalities have been completed, you are taken to the docks and then onto the yacht. The first few minutes are exhilarating! You chat to your friends and dream about the week ahead! The swimming, the restaurants, the nights at anchor. And, of course, the sailing. It’s a dream come true!
Then, after a few minutes, as the ‘person who knows sailing boats’ and the instigator of the voyage, you start to be asked questions about the use of the toilets, the stereo and the other systems on board. You soon realise that the systems don’t work at all like they do on your yacht: the batteries are not organised in the same way, the toilet system is different and, above all, the cockpit is organised differently. What should you look out for?
This series of texts describes how to familiarise yourself with a new yacht. The first texts describe the recipe, while the last (to come) apply the recipe to a Contessa 32. The introduction borrows from the idea of a holiday in the Caribbean, but the texts apply just as much to a loan, charter, delivery or any other situation where you need to learn how to use a new yacht.
The texts are separated into elementary, intermediate and advanced elements of familiarisation. The idea is to read the sections progressively, depending on how familiar you are with managing a sailboat.
What is a familiarisation?
A familiarisation is an inspection carried out by a Skipper when he or she is unfamiliar with the specifics of a sailboat. It assumes that you know how to sail, but that you need to identify the information needed to operate the boat. This type of inspection is more detailed thana departure check, but less detailed than a pre-purchase inspection.
A familiarisation aims to obtain the information needed for use, to diagnose problems on the water, to check compliance with standards and regulations, and to act in an emergency. It is not intended to check everything. We don’t necessarily assess the value of the systems, or the list of all the repairs that need to be made. Rather, it’s about assessing what you can do with the boat in its current state and what you need to know to use it properly.
I think about this a lot in the context of a job, charter or course, where a sailboat management company is in charge of repairs and maintenance, but where as Captain, you have to check that the sailboat is functional … and that you know how to use it. This is sound practice if you’re ultimately in charge of safety on board.
In practice, familiarisation breaks down into the parts of the boat that work together:
- What makes it possible to float: hull, through-hulls, stern and instruments piercing the hull;
- Auxiliary propulsion: engine, shaft, propeller, tank;
- Main propulsion (standing rigging, sails, running rigging);
- Cockpit (helm/wheel, position of halyards and sheets, winch, engine panel, etc.);
- The 12V electrical system (wiring, batteries, navigation lights, etc);
- On-board living systems (stove(s), toilet(s), bunks, canisters, regulators, tanks, etc);
- Mooring and anchoring gear (mooring lines, fenders, windlasses and anchors);
- Survival/emergency equipment (liferaft, distress lights, fire extinguishers, etc.);
- Paperwork (registrations, certificates, regulations, etc.).
Below, I detail what to look out for in the first three of the above grouping.
Hull and hull passes
Hull familiarisation aims to answer three questions:
- Basic: where are the possible water inlets?
- Intermediate: what impact does the shape of the hull have on the vessel’s performance?
- Advanced: what are the yacht’s stability characteristics?
Basic: drawing up a hull passage plan
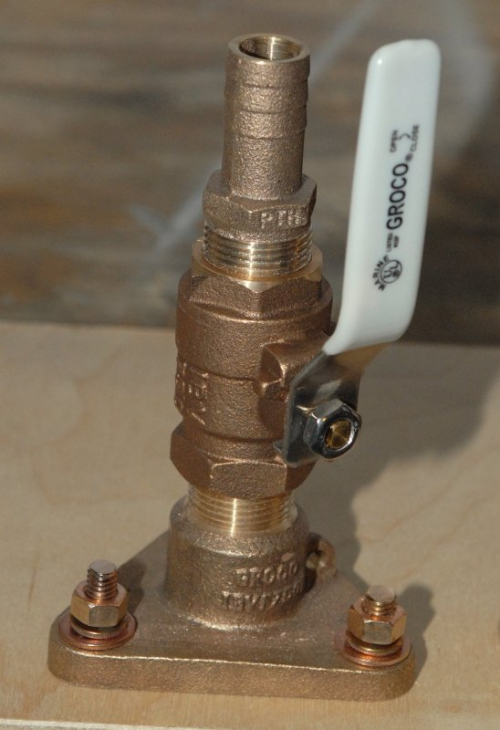
Unless there is a collision, water will enter through the holes already drilled. This is a piece of equipment that will give way with wear and tear, and the water ingress will have to be plugged up. It is therefore useful to draw up a plan of the through-hulls, including the instruments passing through the keel and the stern tube. If the boat has a bow thruster, you’ll also want to inspect it.
There are three things we want to know:
- Find out where the holes are in the hull;
- Check the condition of the through-hulls (corrosion, sealant, etc.); and
- assess whether appropriately sized pinoches are available.
Knowing where the holes are in the hull will make it easier to find them in the event of damage. Of course, knowing where the pins are also helps. Ideally, each through-hull fitting should have its own pin.
Usually, one side of the hull has more through-hull fittings than the other. One side is for taking in clean water, while the other is for discharging dirty water. There are very few yachts where the sink intake is next to the toilet discharge! Identifying which side has the most holes is useful in an emergency. In the event of damage and without any additional information, you can put the yacht on the tack of the hull with the hole. This maximises the chances of reducing the rate of water ingress while waiting to identify the source.
Intermediate: hull structure and performance
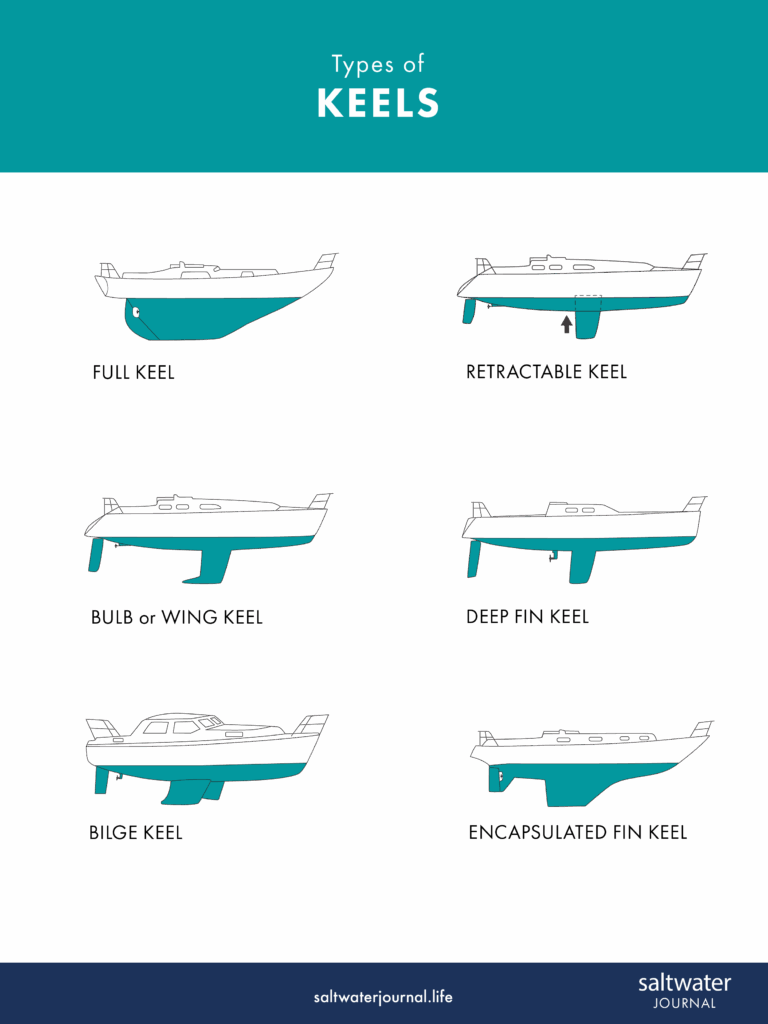
Inspection of the keel type can be carried out visually, in the spring, or with the help of plans (for example, by consulting the excellent sailboatdata.com). The aim is to identify the general characteristics of the keel. Using the images above as a guide, you could, for example, classify the yacht on a scale where, on one side of the scale, you have a solid keel and, on the other, a threaded keel (with a bulb, or similar).
As a general rule, the closer the keel is to a full keel, the easier it is for the yacht to stay on course, but it will be more difficult to manoeuvre at low speeds (or when going astern). Conversely, a yacht with a keel close to a thread keel will be very manoeuvrable, but it will only take a small lateral thrust (wave, wind, etc.) to make it lose its course.
In the same vein, a very flat hull (similar to a canoe) will make a faster, more manoeuvrable boat, but will be extremely uncomfortable in high waves. Each wave will be the equivalent of a diver making a ‘flat’: a lot of noise, a lot of surface impact and therefore greater stress on the materials. Conversely, a hull that gradually descends towards the keel will ‘split’ the water with each wave, making the boat more comfortable in high seas.
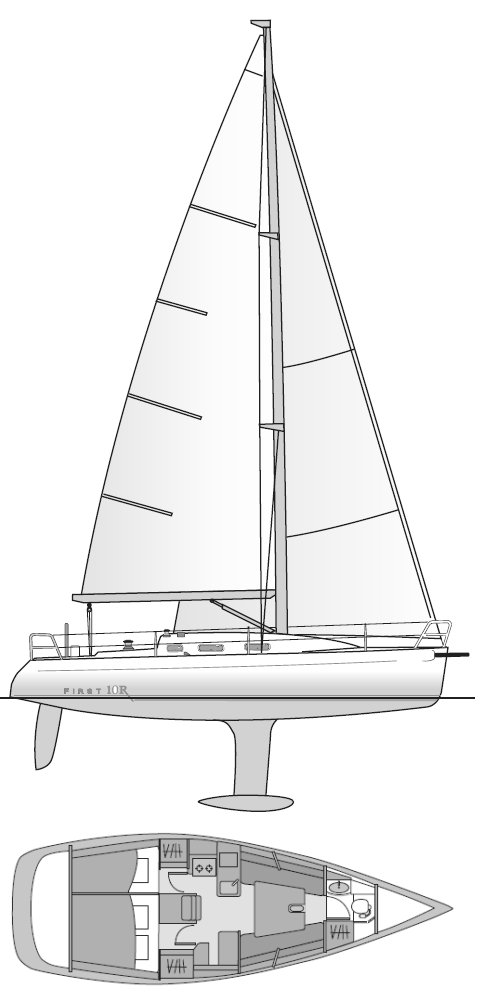
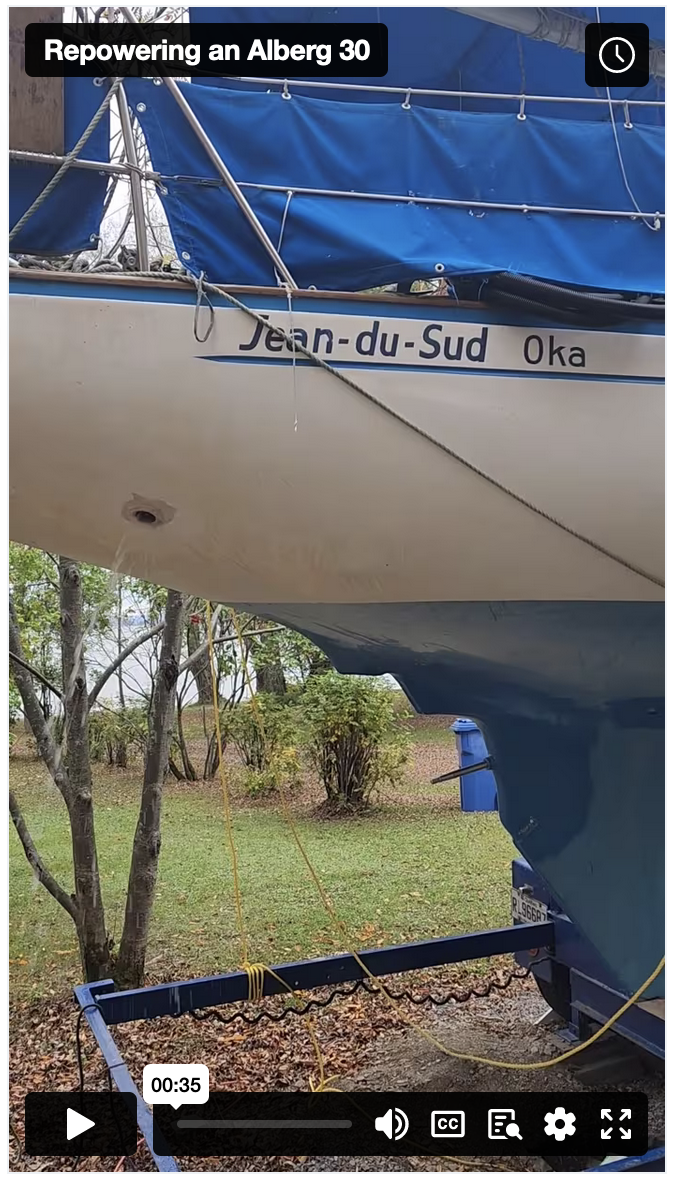
For example, a Beneteau First 10R (pictured left, below) is very easy to handle, as the keel is thin and does not prevent the boat from turning. On the other hand, the hull bottom is flat, which makes it very noisy in every wave. In contrast, the Alberg 30 (pictured right) has a full keel that rises progressively at the bow. It will be very comfortable in high seas, but will be more difficult to manoeuvre at low speeds.
Other features are also worth noting: on the Beneteau, the front of the rudder is completely exposed, which can easily cause it to break in the event of a collision. On the Alberg 30, the front of the rudder is fully protected by the keel, making it virtually indestructible. A general inspection of the hull gives an idea of the yacht’s performance.
Hull speed
Hull speed is a theoretical speed limit for a yacht. Specifically, it is the speed at which the yacht starts to fight its own waves. By going faster, a sailboat creates waves at its bow. More energy is needed to split these waves. The faster a yacht goes, the more energy it needs to go faster!
It’s not impossible to exceed hull speed, but you need a lot more energy (wind or engine speed) than at lower speeds. In practice, you can go faster if you’re helped by breaking waves or the current, but it’s difficult, on average, to sustain a higher speed in relation to the water.
Hull speed only depends on the boat’s length at the waterline (not its overall length). If the length l is in feet, the hull speed v (in knots) is given approximately by:
v \approx 1.34\sqrt{l}.(Other texts give 1.32 or 1.35 as the multiplication coefficient: this is an empirical formula which varies with estimates)
The table below summarises the hull speed for different lengths:
| Length of yacht at waterline (feet) | Hull speed (knots) |
| 23 | 6.4 |
| 25 | 6.6 |
| 28 | 7.1 |
| 30 | 7.3 |
| 35 | 7.9 |
| 38 | 8.3 |
| 45 | 9.0 |
Hull speed can be a good first approximation for making a sailing plan. It’s also a factor to consider when assessing reefing, because if the wind picks up at hull speed, there’s virtually nothing to be gained by keeping full sail. Of course, there’s no substitute for practical measurements, but hull speed gives a good indication of a sailboat’s capacity when you need to get used to it.
Advanced: stability characteristics
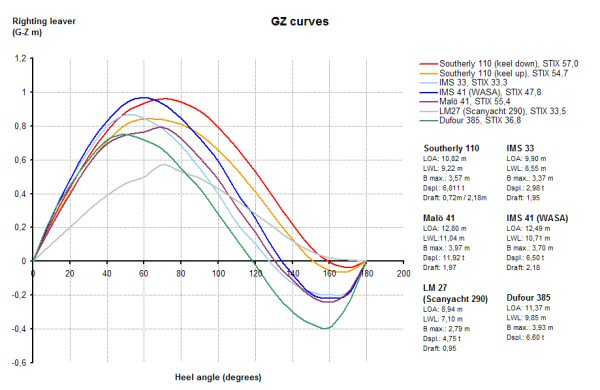
A yacht’s static stability curve describes how stable it is. In the image above, the graph shows six stability curves, one for each of the six yachts (e.g.: Southerly 110, in red to Dufour 385, in green). The horizontal axis gives the angle of heel of the yacht. The vertical axis gives the length of the righting force between the centre of buoyancy and the centre of gravity. The greater this force arm, the faster the boat will right itself.
For example, for the IMS 41 (dark blue curve), the righting arm is greatest at an angle of 60°. This means that if the boat heeled at 60 degrees because of a wave or an excessive gust of wind, it would return to the horizontal very quickly. Remember that 90° corresponds to a sailboat tilted to one side (mast horizontal) and 180° is a sailboat upside down (mast down).
The set of angles where the righting arm is positive is a sailboat’s reserve stability. Conceptually, it is the sum of the moments of force required to right the yacht. The larger it is, the faster a yacht will right itself. The wider it is, the more stable a sailboat is over a wide range of heights.
The stability limit angle is the maximum angle of heel at which the yacht will right itself. Beyond this angle of heel, the yacht will capsize. On the graph, this is the point at which the curve again crosses the
For the Southerly 110, the limit angle of stability is 160°. So you have to understand that the boat has to be almost upside down … for it to stay upside down. Even if the boat had a 100° list (mast under water, etc.), it would return to the vertical. It’s a very stable boat. For the Dufour 385, the limit angle of stability is 120°, so it’s a little less resistant to heeling. If it heels more than 120°, it will capsize.
It is not the purpose of this text to give a complete description of the stability of sailing boats. I shall confine myself here to the characteristics of static stability. These characteristics are important for understanding the extent to which a sailboat resists waves, but neglects the repeated effect of waves or wind (dealt with by dynamic stability).
Static stability curves, such as the image above, are often available online, or supplied by the manufacturer’s brochures. It is also possible to carry out practical tests, but these can be very expensive. The videos below illustrate practical techniques. You can also see some spectacular tests on motorboats.
The drive train
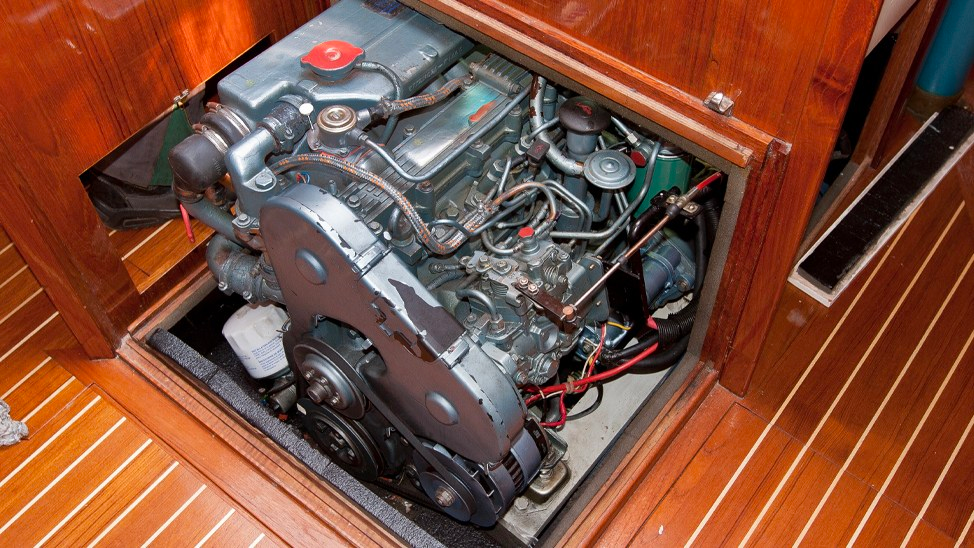
Most yachts over 25 feet have seawater-cooled diesel engines, which are connected to the propeller by a shaft and a transmission. During familiarisation, you want to be able to identify the main components involved in its operation:
- Elementary:
- what do you need to know to maintain and operate the engine?
- where are the emergency devices associated with the engine(s)?
- Intermediate level:
- the location of the starter battery, the diesel tank, its supply line, the water cooling line and the exhaust line.
- diesel tank capacity and engine consumption.
- Advanced:
- the ratio of propeller power to engine power.
- how to clean injection nozzles.
Basic: routine maintenance and emergencies
Is it necessary to open or close the through-hulls before starting the engine? Is only one operating lever required for forward/reverse, or are two levers needed? Where is the stop button? Note what’s out of the ordinary, and what you need to remember to run the engine normally.
Normal engine maintenance involves the day-to-day tasks that need to be done when the engine is running well: oil, water, cooling, diesel and maintenance cycle. Most of the familiarisation consists of identifying where things are. The most common tasks are opening and closing the cooling system bypass and checking the oil level. It’s essential to identify where the instruments are located to perform these tasks.
To identify the engine cooling line through-hull, simply follow the cooling pipework. The pipework generally starts at the front of the engine and can be clearly identified by the rubber impeller. If you follow the pipe, you will inevitably come to a through-hull. The through-hull must of course be opened before starting the engine.
For the oil, you need to identify the dipstick that measures the oil level (usually on the side of the engine). Measuring the oil level is not particularly difficult. You also need to identify the location of the oil filler cap, which is usually directly on top of the engine.
Before starting the engine for the first time, a WOBBLE diagnosis should of course be carried out. It also pays to ask someone who has used the yacht how the engine behaves. You can learn a lot from open questions such as “How does the engine behave? and “How is the engine maintained?
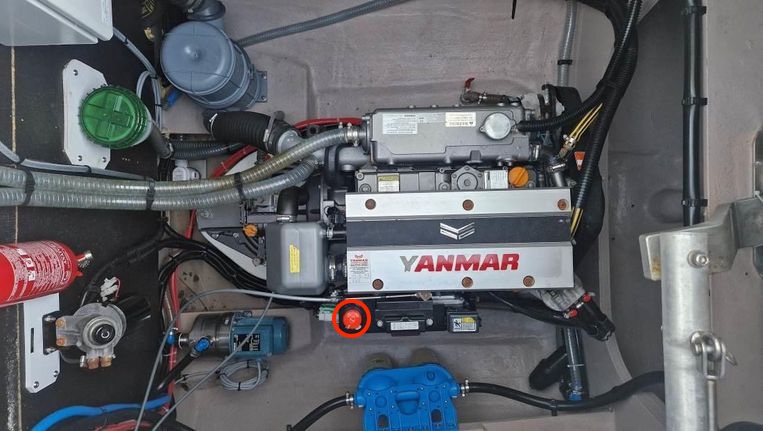
Next, you need to think about possible emergencies or malfunctions. There is usually a mechanical kill switch that prevents the engine from completing the compression cycle. This must be identified. The location varies according to the make and size of the engine. On small sailboat engines, it is generally at the front of the engine, close to the power control cable. On larger engines (catamarans, etc.), it is often a separate button located on the 2nd control panel.
On some yachts, mainly those registered as commercial vessels, there is also an emergency shut-off valve for the diesel inlet and either a carbon dioxide insertion port or an automatic fire extinguishing system in the engine compartment. It’s a good idea to identify them and see how they work. If there isn’t one, you can also think about an emergency plan to cut off the diesel supply. For example, identify how to disconnect the pipework from the tank (with a knife, or similar). In all cases, you’ll want to identify where the appropriate fire extinguishers are located in the event of an engine fire.
Finally, you’ll want to know a bit about the engine’s maintenance cycle, if only to keep a proper record of wear and tear while you’re using the boat. It’s not rocket science. It could be something as simple as “the oil change is due”, or “it’s been at sea for 400 hours”. We want an idea, so that we can pass on this information when we return, or at the end of the season.
Intermediate: onboard repairs
There are two dimensions associated with the intermediate level. Firstly, developing an understanding of what the drive train can do in terms of the sailboat’s manoeuvring capabilities. Secondly, it is useful to assess what can break at sea.
Manoeuvring capabilities
We want to get an idea of the yacht’s ability to manoeuvre itself when the engine is in reverse. We also want to know the extent and direction of the propeller pitch. These two pieces of information are useful for docking properly. There’s no magic formula: the best thing is to do a few practical tests on your first outing, to get a feel for the boat.
Repairs at sea
A colleague with whom I did a delivery trip summed up repairs quite clearly: at sea, you don’t repair an engine, you repair everything around it. By everything around it, I mean filters, belts, anodes, oil and water systems.
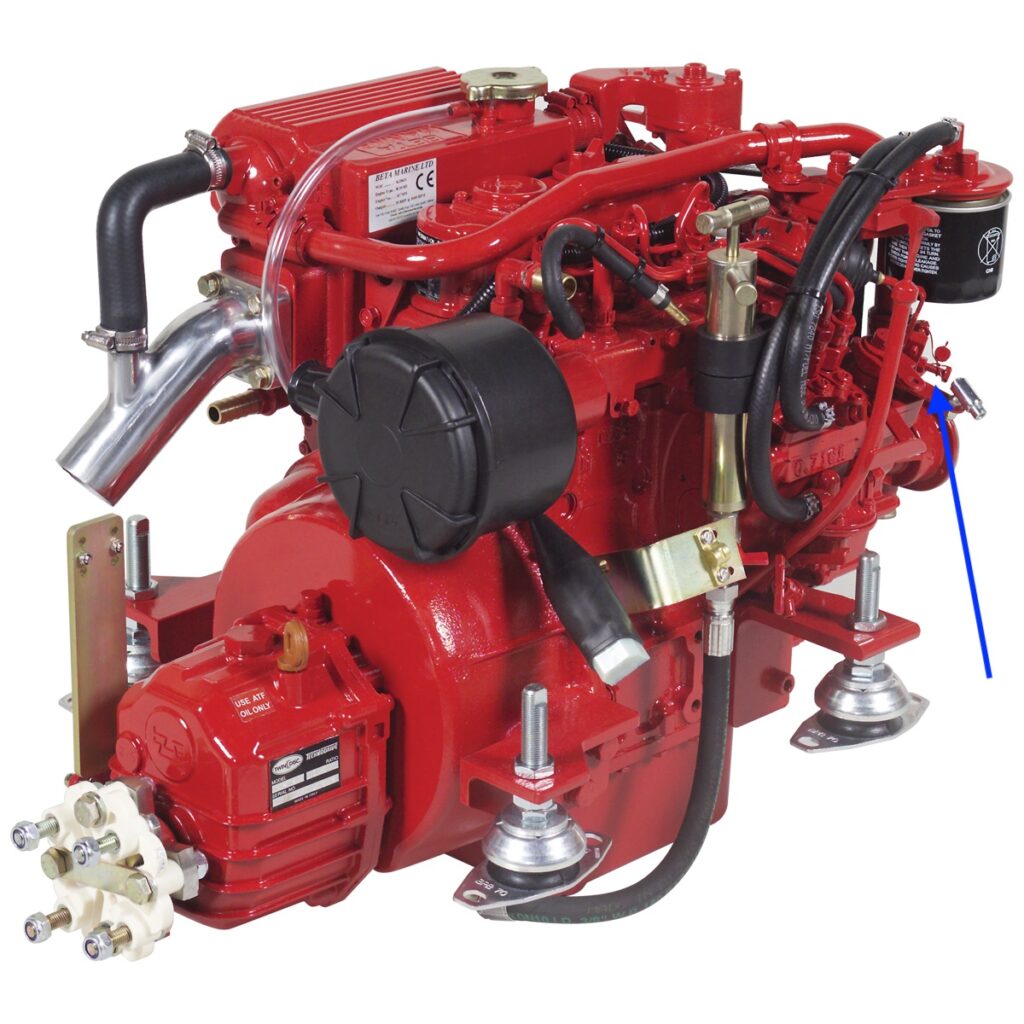
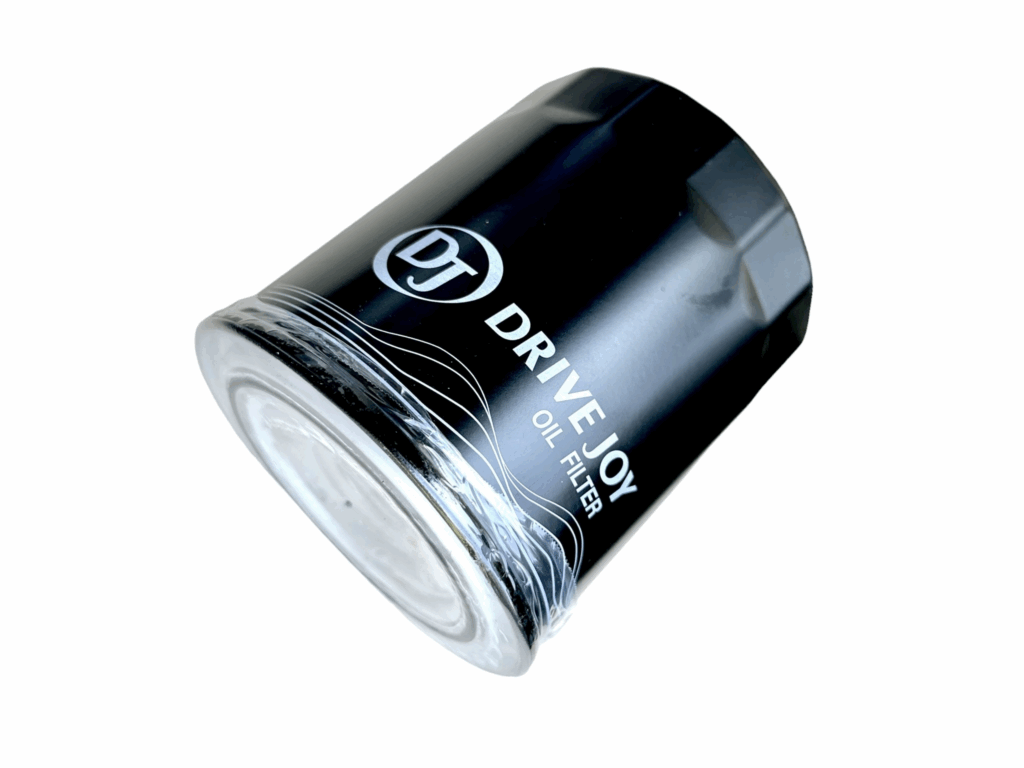
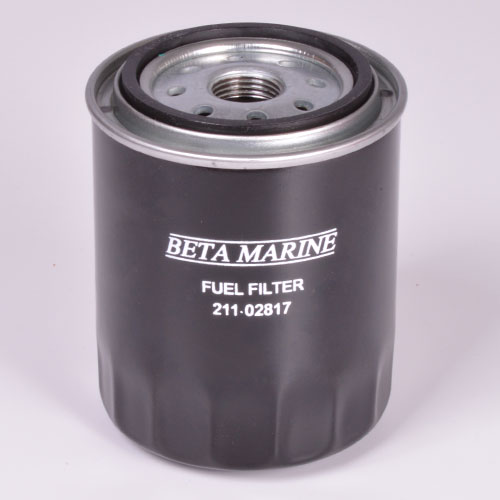
So it’s useful to be able to identify where the filters (diesel and oil, see images below) and sacrificial anodes are.
An inspection of this kind is also worth reading the manufacturer’s manual. You get the diesel consumption data. Combined with the tank capacity, you can then determine the cruising range of the sailboat (with motor). This information is useful for cruising in rough seas, or if recharging the batteries requires the use of the engine. The manual can also provide a detailed overview of spare parts and critical areas for general maintenance. Knowing where the components that need changing or troubleshooting are is half the job.
With a little experience, familiarisation becomes mainly an exercise in assessing what is ‘different’ from a generic drivetrain. Is there a water filter in the engine cooling system? Does the exhaust system have a ‘gooseneck’? Note the differences and, above all, consider the implications in terms of use and repair.
Ultimately, identifying the drivetrain components will also give a good idea of how to access them. If you have to dismantle a bunk at the stern of the yacht to gain access to the inside of the stern tube, it’s handy to know this in advance… and how to dismantle the bench seat.
Advanced: power train performance
The advanced characteristics analysis seeks to identify how the drive train will behave in abnormal situations. The two most likely scenarios I can think of are recovering a person from the sea, or returning to port in very bad conditions. In these circumstances, you want to see how much the drive train can deliver in terms of manoeuvring capabilities that are out of the ordinary.
The ratio of propeller power to engine power can be identified by theoretical specifications(here, here and here for good reading), but with a little experience and the practical limits of existing combinations, it becomes more a matter of quick observations. As a rule of thumb, a 20-horsepower (or larger) engine will be overpowered if it is attached to a two-bladed propeller twelve inches in diameter.
The rated power of the motor will be reflected in cavitation… not manoeuvrability. Conversely, a lower-powered engine attached to a propeller of similar surface area will provide (at equal pitch ) maximum power, but will immediately show its limitations.
Here again, there’s nothing like practical experience. A good test consists of noting the rated power of the engine (usually in the manufacturer’s manual) and seeing how the yacht behaves at this power. If you hear the propeller revving, or notice that the boat is barely moving forward, then the engine is overpowered in relation to the propeller (and vice versa).
Main propulsion
- Elementary:
- What is the sail configuration?
- How is the running rigging organised?
- How are the sails hoisted?
- Intermediate:
- What is the condition of the sails?
- How do you change the sails at sea?
- What is the condition of the running rigging?
- Advanced:
- How is the standing rigging configured?
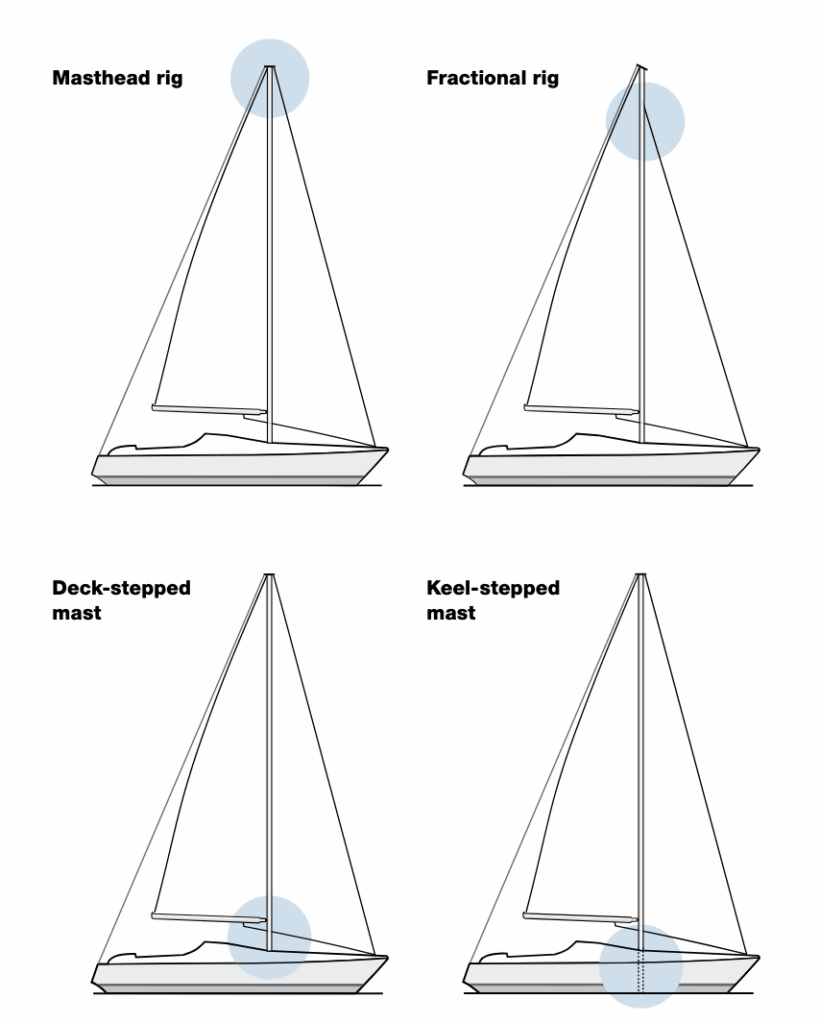
Basic: how are the sails configured?
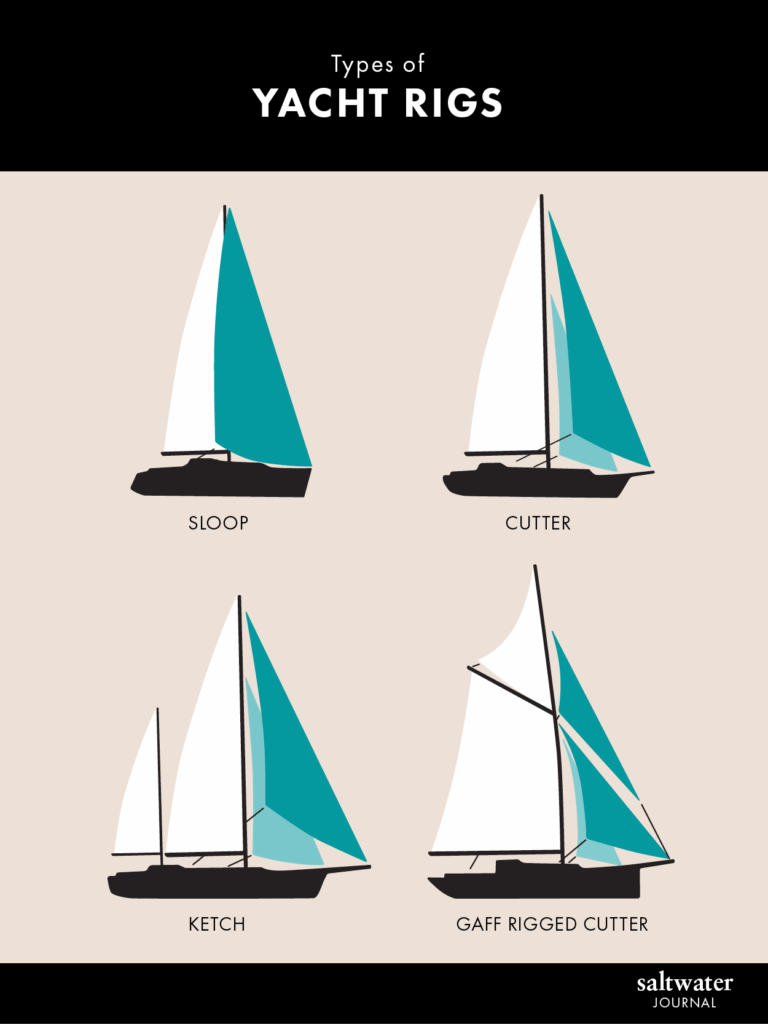
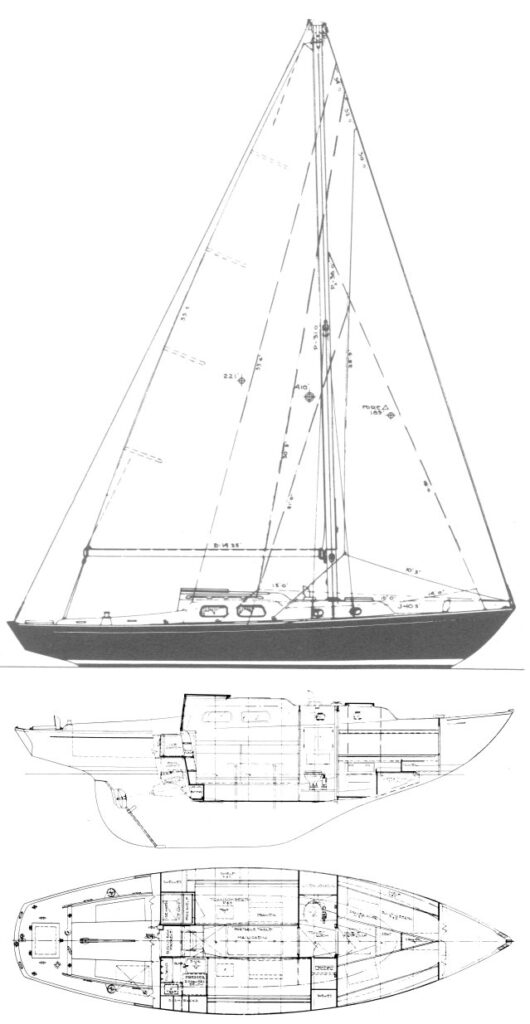
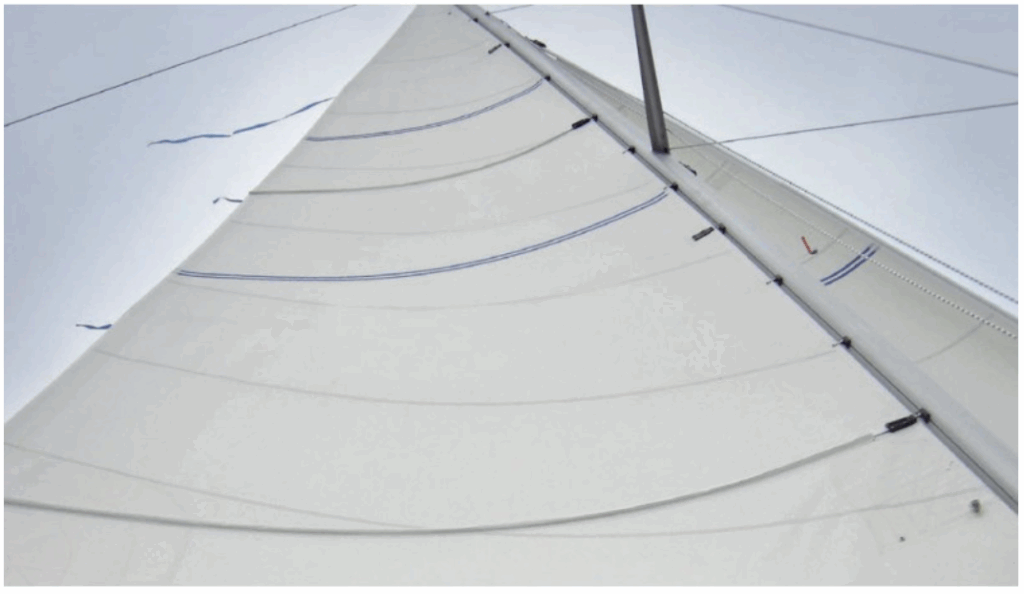
The image above summarises the main types of sail organisation (there are some missing, but it’s a good start). To identify the type of sailboat, we count the number of masts and the number of stays. These are the fundamental supports for the sails. From here, you can identify the type of sailboat and the sail configuration options. We can also identify whether there is a spinnaker and a spinnaker pole.
It is not the purpose of this text to show how to manoeuvre the different sail configurations, but at an elementary level, it is a good exercise to learn to recognise them.
Most sailing boats are sloop-rigged. This is the fundamental configuration to master. The other configurations, in essence, give you more options when it comes to organising the sails.
How is the running rigging organised?
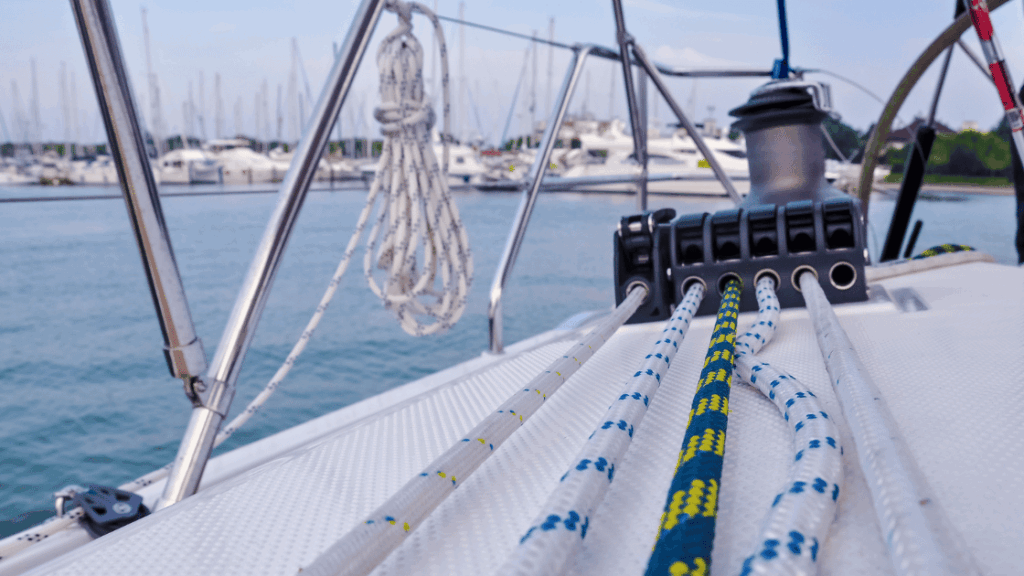
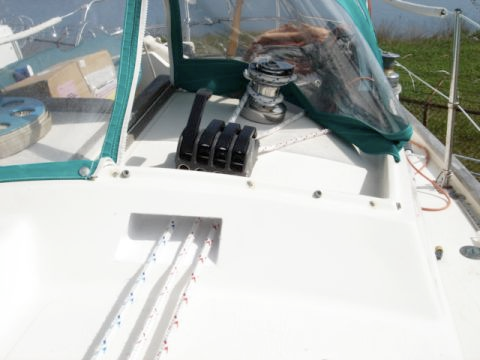
On a sailing boat, no rope is called a rope! A halyard is a rope used to hoist a sail. A line is a rope used to modify the shape of a sail (e.g. reefing line). A sheet is a rope used to control the position of a sail (e.g. mainsheet). A topping lift is a rope used to raise or lower the boom. The boom vang is sometimes a rope used to prevent the boom from rising uncontrollably. Together, these ropes make up the running rigging.
Organising the rigging involves identifying where the halyards, sheets, bosses and other ropes (toggles/lazyjacks, etc) are located. It is the identification of the location of the ‘levers’ with which the sails can be manoeuvred.
Many yachts configure the running rigging so that it returns to the cockpit of the yacht (image above, image below left). This means you can handle the sails without having to leave the comfort and safety of the cockpit. Other yachts have halyards (usually secondary) attached to the mast with a dedicated winch (below, right-hand image).
During familiarisation, you need to identify all the current rigging. The simplest technique is to gently pull on each of the lines to see where they go and what they do. You can then form a mental map of where each one is. Generally, some form of logic will emerge from the locations (humps on port, halyards on starboard, or similar configuration), but it’s common on commercial yachts for the rigging to be in different places than the jammers(piano, cleats, etc).
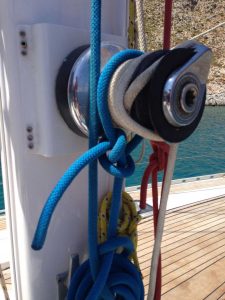
It’s also a good idea to understand how the genoa furler works and how to handle the sail if it jams. Most problems come from the attachment mechanism between the stay and the cylinder holding the furling line.
How do you hoist the sails?
Every sailboat has its own particularities for hoisting sails. These peculiarities are often based on minor defects or stowage methods. For example, it’s possible for sliders to jam, for the halyard to be hit on a sail track, or for battens to have a tendency to jam in lazy jacks. It’s also possible that the rigging configurations are so specific that they need to be taken into account when hoisting the sails: an elastic topping lift, a mechanical boom vang or a sail that rolls up the mast.
Whatever the case, it’s an excellent idea to hoist the sails in a relatively safe environment (at the dock, facing into the wind, mooring) so that you can understand these subtleties (hoisting, lowering, reefing). This knowledge is useful if you have to work with new people, or if you have to manoeuvre on the high seas.
Intermediate: what is the condition of the sails?
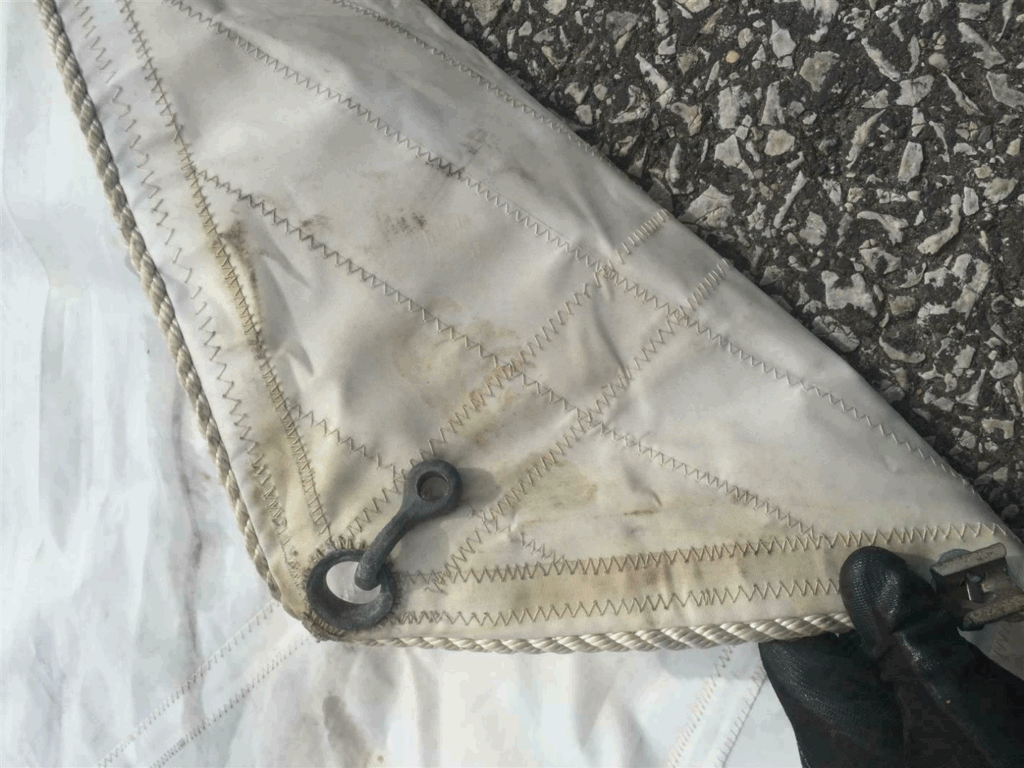
A good inspection of the condition of the sails is necessary. It’s a good idea to look at the condition of the seams, sliders, battens, eyelets and general colouration. We’re looking for signs of excessive wear… or rather the lack of it.
The condition of the seams consists of seeing whether the fabric is holding together well and whether any seams are coming apart. The ‘sun test’, i.e. looking through a sail exposed to the sun, is also indicative of wear to the seams and various parts of the sail. If too much sun is shining through the sail, it’s a good idea to bring along a makeshift repair kit.
The number of ‘patches’ added to the sail is also a sign of wear. It’s like any other fabric: the more repairs, the weaker the underlying fabric. Similarly, discolouration of the sail is a sign of wear. Most sails are made of Dacron, a fabric that is not very resistant to ultraviolet rays. The longer a sail is exposed to the sun (a few years), the more it discolours and the stiffer and less resistant it becomes
Sliders are the parts that connect the sail to the mast. On some yachts they are made of plastic, but on others they are made of metal (and on rails). We want to examine how well they hold the sail and whether there are any signs of damage that could separate them from the mast (which it is also useful to examine).
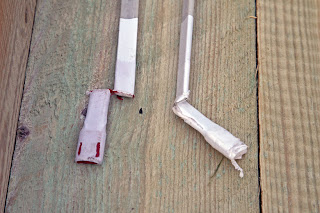
Battens are the pieces of fibreglass inserted into the mainsail. Like tent poles, battens help shape the sail. Their inspection consists of assessing whether they are about to break (the points of contact between the shrouds is often the breaking point). A fibreglass fracture is easy to identify and looks like a lightning bolt (image below).
Broken or fractured battens will undoubtedly damage the fabric of the sail. Depending on the budget and the situation, they are either repaired or replaced. The minimum repair involves wrapping them in electrical tape (or duck tape) to prevent the fractures rubbing against the sail.
You should also take a look at the ends of the battens. On the mast side, check that they fit into the clamps attached to the sliders. On the opposite side, check that the batten will not break the end of the mainsail.
On the grommet side, you just want to check that they are still firmly attached to the sail. The more they are loosened by wear and creases, the more likely it is that the rope will come loose from the sail. This is very rare, but it is also possible to see corrosion on low-quality eyelets, in which case the same remarks apply.
What is the condition of the running rigging?
Identifying wear on the running rigging is much the same as for any other rope. Signs of wear include partial cuts or fraying, permanent stretching, signs of halyard rot and dents, significant discolouration, or the rope breaking down into small strands or powder. Cuts, decay and rot are signs of replacement. The rest is more like an assessment of the remaining life of the string. If the duration is potentially shorter than the voyage, then it’s a good idea to have a contingency plan for replacement at sea.
If there are dents running through the boom, it’s an excellent idea to run them all the way through, power if the hidden parts of the boom have excessive wear. On a boat that hasn’t been reefed for a long time, it’s even possible to find a bird’s nest!
How do you change sails at sea?
The worst time to learn how to change a sail is when the sail needs changing. In terms of priority, you need to know how to reduce the sail (reefing), but also how to fit a smaller jib, or even a staysail. Changing sails is not complicated, but it’s a good idea to practise the manoeuvre at sea. Doing it once or twice is enough, and then you have a solid enough basis to adapt the technique to the specific characteristics of each sailboat.
Advanced: what is the configuration of the standing rigging?
The standing rigging needs to be checked for tension and wear. The first place to look is the state of the chainplates. The main aim is to assess the absence of rust, delamination and cracks. The wiring making up the standing rigging should be free of torsion, and the connection to the turnbuckles free of rust or split wires.
The ‘finger test’, i.e. running your fingers along the steel cables of the rigging, is quick and practical… but comes at the price of bleeding if a cable proves to be broken. If you’re ready to climb the mast, inspecting the turnbuckles at the top of the mast is a good idea.
None of this is a complete inspection (you’d have to dismast), but for familiarisation purposes it’s a good overview. When it comes to rigging tension, it’s useful to consult mast manufacturers ‘ specifications and to have a tension meter to hand.
Conclusion
The aim of a familiarisation test is to learn how to use the sail and to think about the unexpected. This text, which is already very long, covers three essential parts of a sailboat familiarisation: the hull, the engine and the sails. These are the essentials for getting around… and not sinking!
The elements discussed in this text become much more concrete when you put them into practice. In this context, the next text in this series will apply the inspection elements discussed above to the familiarisation of a Contessa 32. The third text will return to the generic elements of familiarisation with electrical systems, navigation and life on board. The fourth and final text will take up the example of the Contessa 32 and apply it to this second part.
References
Astrolabesailing.com (2016). Boat stability, web page retrieved online in July 2025 at this address.
B&B Yacht Designs (2017). Core Sound 17 Mark 3 Controlled Stability Test, video retrieved online in July 2025 at this address.
Binnacle.com (n.d.). Tension gauge, web page retrieved online in July 2025 at this address.
Calder, N. (2006). Marine Diesel Engines, web page retrieved online in July 2025 at this address.
Francbleu.com (2019). Les mots de la voile : que veut dire le mot “pétole”, web page retrieved online in July 2025 at this address.
Hughes, J.F. (1997). Formula for hull speed based on length, and its limitations, web page retrieved online in July 2025 at this address.
Lance Mechanics (2025). Dipstick Debate: How to Check Oil Properly & Avoid Overfilling | Mechanics Opinion, video retrieved online in July 2025 at this address.
MD Design (2013). Charleston City Boatyard Sailboat Stability Test, video retrieved online in July 2025 at this address.
Pierdusud.com (2024-a). Professional skipper: 8 lessons learned, web page retrieved online in July 2025 at this address.
_____________ (2024-b). How to become a boat captain, web page retrieved online in July 2025 at this address.
_____________ (2025). A mini guide to adjusting standing rigging, web page retrieved online in July 2025 at this address.
Uship.fr (n.d.). Pinoches standard size, web page retrieved online in July 2025 at this address.
Sailboatdata.com (n.d). Contessa 32, web page retrieved online in July 2025 at this address.
SampsonBoats (2025). Mooring a 30-tonne boat alone – tips for easily manoeuvring heavy vessels!”, video retrieved online in July 2025 from this address.
Saltwaterlife.com (n.d.) Beginner’s Guide to Buying a Yacht, web page retrieved online in July 2025 from this address.
_______________ (n.d.) Beginner’s Guide to Types of Sails, web page retrieved online in July 2025 at this address.
Transport Canada (2021). TP14525E, Pre-Departure Checklist, web page retrieved online in July 2025 at this address.
YachtingMagazine (2008). Deciphering Your Engine’s Performance Curve, web page retrieved online in July 2025 at this address.
YachtingMonthly.com (2022). Troubleshooting problems with your yacht rigging, web page retrieved online in July 2025 at this address.
